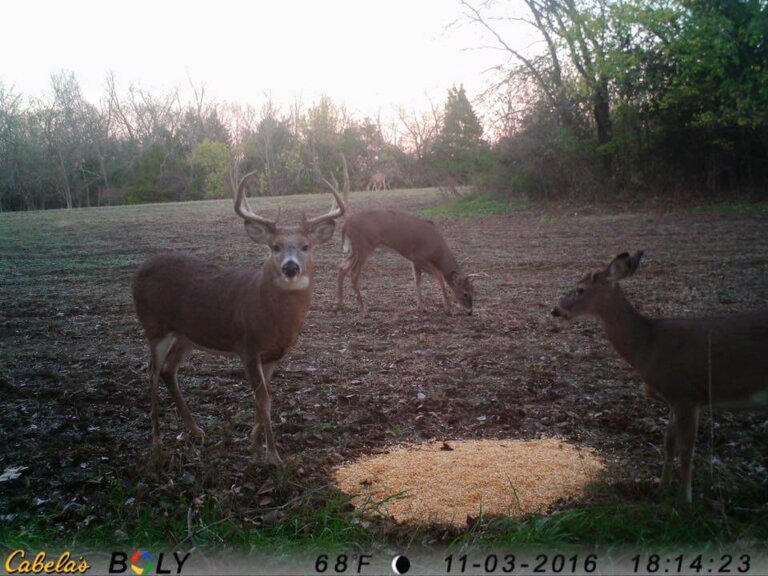
Trail cameras have become super popular in the hunting world over the last decade. They are both a fun and useful tool in helping with hunter’s success. In this article I’m going to go over a few quick tips to hopefully help you get better pics on your cameras this season.
1. Laws
Many states have rules or regulations on the use of or the way that trail cameras can be used. So my first tip is know and be familiar with your local game laws when using trail cameras.
2. Quick Camera Settings
When setting a trail camera, it is always important to use the proper settings. There are many settings, but I will go over the two most important. The first and most crucial is the time and date. You always want to check this and make sure it is correct. It is crucial to know exactly when the target animal is in the area when trying to learn the habits and patterns of the animal. The next setting I always check is the photo mode. For trail cameras that I set up to catch animals on a trail, I want them to take as many photos as possible so I will not set a time delay for fear that the first animal may trigger the camera and I might miss the next as they walk on by. When setting a camera where the animal is hitting water or a mineral lick, I will set my cameras to take 3 photos every minute.
3. Height/Angle
I usually set my cameras 4.5 to 5 feet off the ground for most occasions. On a trail, set the camera 10 yards from the target area and make sure that your camera is set at a 45 degree angle to the trail. This will reduce your chances of missing an animal walking on that trail due to trigger delay. When setting a camera on water or a mineral lick, you should place cameras 10 yards away. Angle the camera so it appears to hitting you about waist height when you are standing at your target area. Always double check by having the camera snap a few pictures and checking them to make sure they look like what you want before you leave.
4. Direction
The best direction to face trail cameras is either north or south. Facing them these directions will reduce sun glare and shadows. Both sun glare and shadows will result in false camera triggers causing the SD-card to fill up with unwanted pictures.
5. Remove any debris
It is very important to remove and debris in front of and around the camera. You do not want anything obstructing the view of the camera. These include small branches and grass that may accidentally trigger the camera and any grass or vegetation that will move easily in the wind in front of the camera. Pay close attention to limbs surrounding you camera; if there are any within the flash of the camera, it will cause the flash to reflect back at the camera, resulting in washed out pictures.
Hopefully these few quick tips will help you a bit while you’re in the field. Good luck this season and shoot straight.
